How to Launch an AWS EC2 Instance

Amazon Elastic Compute Cloud (EC2) is the AWS service for running virtual machines. instances. in the cloud. An instance is just a server you rent by the hour: you pick the operating system, how much compute and memory it has, and how it's reachable over the network. It's the workhorse behind a huge range of workloads.
A few of the things teams routinely run on EC2:
- Web and application hosting. serving websites, APIs, and server-side apps. This is the most common use by far.
- Development and testing. disposable environments configured exactly the way you need to build, test, and debug.
- Data storage. databases and files on attached EBS (Elastic Block Store) volumes.
- Big data and machine learning. Hadoop or Spark jobs, and training or serving models on GPU-equipped instances.
- Content delivery. acting as origin servers behind a CDN for images, video, and other assets.
- Containers. running workloads through Amazon EKS (Kubernetes) or ECS.
- High-performance computing. scientific simulations and financial modeling on compute-heavy instances.
- Backup and disaster recovery. capturing AMIs (Amazon Machine Images) for quick recovery after a failure.
- Hybrid and edge setups. connecting on-premises infrastructure to the cloud, or processing IoT data closer to its source.
- Load-balanced fleets. sitting behind a load balancer for high availability and fault tolerance, including game servers.
The trick is matching the instance to the job. AWS offers families optimized for compute, memory, storage, and GPUs, plus three pricing models. on-demand, reserved, and spot. so you can tune for either flexibility or cost. For a first launch, the defaults are fine; you can always resize later.
Before you start
All you need is an AWS account. If you don't have one yet, sign up at aws.amazon.com. the free tier covers everything in this guide.
A note on the screenshots: they were captured on an earlier version of the AWS console and pin Ubuntu 22.04. AWS has since restyled the launch wizard, and 24.04 LTS is now the current Ubuntu release. The sequence of steps and every setting named below are unchanged, so buttons may sit in slightly different places than the images show.
Step 1: Open the EC2 dashboard
Log in to the AWS Management Console, then search for “EC2” and open the EC2 dashboard. This is where every instance, key pair, and security group lives.
Step 2: Launch a new instance and name it
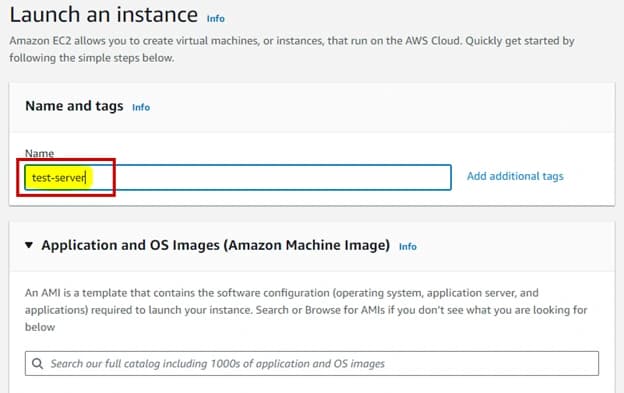
Click Launch instance and give it a clear name. something you'll recognize later when you have more than one running.
Step 3: Choose the operating system
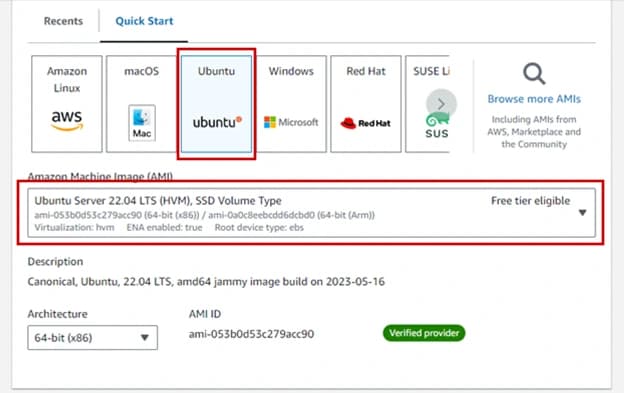
Pick any AMI you like here. Just note that this guide pairs with our walkthrough on deploying a Next.js app on AWS EC2 with Nginx, Ubuntu, and SSL, which assumes Ubuntu 22.04. A different OS would mean different commands and packages down the line, so choose Ubuntu 22.04 if you plan to follow that tutorial next.
Step 4: Pick an instance type
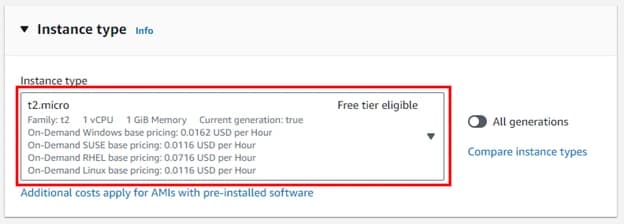
AWS defaults to the free-tier t2.micro, which is plenty for getting started. If your app needs more horsepower, switch to a larger type. but for a first launch, leave it on the free option.
Step 5: Create a key pair
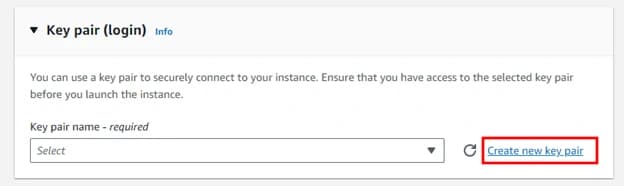
A key pair is how you'll SSH into the instance, so this step matters. Create a new key pair (or reuse one you already have access to) and download the private key file. you can't retrieve it again after this, so keep it safe.
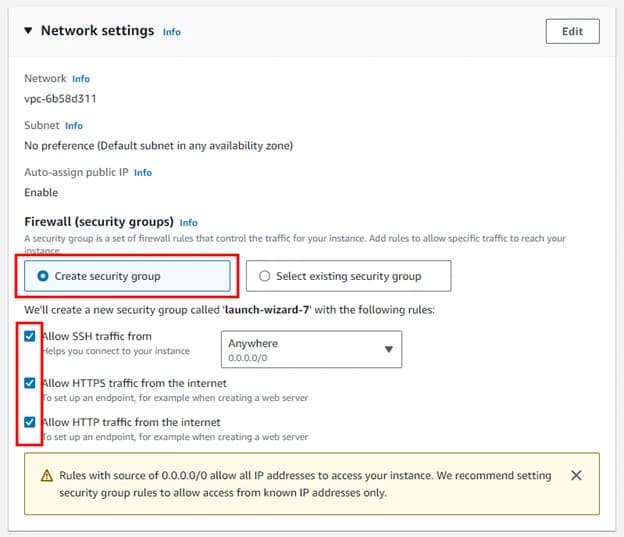
Step 6: Set up the security group
The security group is the instance's firewall. You could reuse an existing one, but for this walkthrough create a fresh group so nothing unexpected blocks you later.
Make sure the inbound rules allow SSH, HTTP, and HTTPS. without those checkboxes ticked you won't be able to connect or serve traffic.
Step 7: Review storage and launch
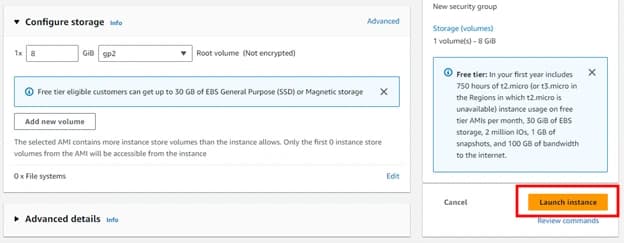
The default storage is fine unless you have specific requirements. there's no need to change it. Review the summary, then hit Launch instance. That's it: your EC2 instance is live.
What's next
With the instance running, you can SSH in using your key pair and start deploying. A natural next step is our guide on deploying a Next.js app on this exact setup with Nginx and SSL. If you'd rather have a team handle the infrastructure end to end, get in touch. or take a look at what we've built.
Thinking about building this?
Appluex designs and ships production mobile & web apps. Including AI features. Let's talk.